Showing posts with label disable. Show all posts

Friday, January 13, 2017

Disable Auto Update Windows 7 Operating System

Disable Auto Update Windows 7 Operating System


Disable Auto Update Windows 7 Operating System ImageSecara default, pada semua operating system windows, tidak terkecuali windows 7, akan selalu mengaktifkan failitas auto update pada windows. Fitur ini membuat operating system windows melakukan download otomatis dari update file yang diberikan Microsoft.

Meskipun begitu, ada kalanya anda akan merasa kesal dengan fasilitas auto update pada windows ini karena mungkin akan mengganggu aktifitas komputerisasi anda sehari-hari. Hal ini terutama akan berefek jika menggunakan koneksi internet yang tidak begitu cepat. Bandwidth internet yang anda miliki akan banyak terpakai oleh auto update yang sebetulnya tidak begitu diperlukan.

Untuk mematikan fasilitas auto update windows 7, ikuti langkah-langkah berikut ini:

  • Klik tombol Start dan lanjutkan dengan klik Control Panel.
  • Dari menu pada Control Panel, klik System and Security.
    Disable Auto Update Windows 7 Operating System Image
  • Pada jendela dari System and Security, klik link Windows Update.
    Disable Auto Update Windows 7 Operating System Image
  • Pada bagian kiri dari jendela Windows Update, klik Change Settings.
    Disable Auto Update Windows 7 Operating System Image
  • Selanjutnya, pada bagian Important Updates, klik dan pilih Never check for updates (not recommended).
    Disable Auto Update Windows 7 Operating System Image
  • Terakhir, klik tombol OK.

Selesai sudah, windows 7 pada perangkat anda tidak akan pernah lagi melakukan update dari server Microsoft. Jika anda menginginkan pilihan setting yang lain, anda bisa memilihnya sendiri. Berikut penjelasan dari fungsi pada pilihan yang lain.

  • Install updates automatically (recommended), merupakan pilihan default dari sistem operasi windows. Pilihan ini akan melakukan download dan menginstall file update secara otomatis tanpa memberitahu anda sama sekali. Pilihan ini direkomendasikan untuk anda yang memiliki akses internet yang cepat yang tentunya tidak akan menggaangg bandwidth yang anda pakai.
  • Download updates but let me choose whether to install them. Kalau yang ini, system akan mengambil file update dari server microsoft tetapi akan melakukan konfirmasi terlebih dahulu kepada anda jika ingin menginstall file update yang telah anda download.
  • Check for updates but let me choose whether to download and install them. Kalau ini, windows akan mengkonfirmasi anda terlebih dahulu sebelum mendownlaod file update dari microsoft. Jika anda mengizinkannya, proses download akan segera dimulai. Setelah proses download selesai, system akan kembali melakukan konfirmasi apakah akan menginstall file update yang telah didownload atau tidak.
  • Never check for updates (not recommended). Seperti judul pada artikel kali ini, system tidak akan pernah mengecek file update pada microsoft dan tentunya tidak akan pernah mendownload file dari server microsoft.

Meskipun anda bisa menonaktifkan auto update pada windows 7, kami sarankan anda tetap mendownload file update secara berkala agar system anda terhindar dari berbagai macam gangguan yang bisa diperoleh file system yang lama. Selain itu, semakin system diperbaharui, maka komputer anda akan berjalan lebih stabil karena adanya perbaikan pada operating system dari pihak microsoft.

Selamat mencoba!


Go to link Download

Read more »

Thursday, January 5, 2017

Disable Windows 10 Tracking

Disable Windows 10 Tracking


Disable Windows 10 Tracking : If you have concerns about Windows 10’s somewhat lax attitude to your personal data, you could hunt through the OS for all the individual tracking settings. Or you could run DisableWinTracking, which provides access to all Windows 10’s important data-collection and tracking settings in one place.

Instructions :
  • Download DisableWinTracking.exe below
  • Open it. It should request for administrator privileges.
  • Choose any/all of the options youd like
  • Select either "Privacy" to enable the tweaks, or "Revert" to revert them.
  • You can read the output in the console dialog to see if it worked.
  • Thats it!


Go to link Download

Read more »

Thursday, December 29, 2016

Disable Right Click On Your Website

Disable Right Click On Your Website


Disable Right Click On Your Website

)

How To Disable Right Click On Your Website Or Blog ?

If you own a blog or a website then you always want to prevent other malicious bloggers from copying the content from your blog. You might have written an article with great efforts and lots of research and other just copy/paste it on their blog. To prevent such users from copying content from your blog i will show you Javascript Trick to disable right click on your blog. So lets get started.

How To Disable Right Click On Your Blog ?


1. Got to your blogger Dashboard and then Click on Layout.

 2. Now Click on Add Gadget and select Html/Javascript.


 3. Now paste code given below in the pop up window.


<!--MBW Code-->
<script language=JavaScript1.2>
function disableselect(e){
return false
}
function reEnable(){
return true
}
document.onselectstart=new Function ("return false")
if (window.sidebar){
document.onmousedown=disableselect
document.onclick=reEnable
}
</script>
<!--Code End http://msajawalyounas.com>


4. Save it and done. Now users will not be able to right click on your website.  
5. If you like to disable mouse on your computer then check out tutorial given below.

Go to link Download

Read more »

Sunday, December 18, 2016

Disable USB ports on Windows PC Registry Method

Disable USB ports on Windows PC Registry Method


This trick allows you to disable access to your USB(Universal Serial Bus) ports on your Windows based PC to prevent people from taking out data without permission or spreading viruses through the use of USB (pen and flash) drives.

To use this trick to disable USB ports, follow the steps given below:-
  1. Click on Start.
  2. Click on Run. If you cannot find RUN, type it in the search box.
  3. Type "regedit" without quotes. This will launch the Registry Editor.
  4. Navigate to  HKEY_LOCAL_MACHINESYSTEMCurrentControlSetServicesusbstor.
  5. In the work area, double click on Start.
  6. In the Value Data box, enter 4.
  7. Click on OK.
  8. Close Registry Editor and refresh your desktop.
  9. To re-enable access to your USB ports, enter 3 in the Value Data box in Step 6.


Try it yourself to make your PC invulnerable from data theft and malware which spread through USB ports. This works on Windows XP, Windows Vista, Windows 7 and Windows 8/8.1, Windows 10.

Note: This trick also disables access to your USB connected peripheral devices. So, do not use it if you have USB connected keyboard and mouse.
Values of [Start] key: Value 3 is for Enabling Ports & Value 4 is for disabling Ports.

Go to link Download

Read more »

Friday, November 18, 2016

Disable the Firefox 3 awesome bar how to

Disable the Firefox 3 awesome bar how to


With firefox 3.x one of the things youll notice is the "Awesome Bar," a new feature that drops down a list of sites from your history and bookmarks as you type. For example, you could type "f," and your bookmark for facebook.com would pop up, along with flabbergasted.com, if youve recently visited it.
For some people, this is going to be handy, but others are going to hate it.

How to turn it off: In the address box type about:config . Click past the warning message, and search for browser.urlbar.maxRichResults. This sets how many recommendations the Awesome Bar will display. 12 is the default, but you want to change it to 0 so you wont have those pesky addresses there anymore.


Go to link Download

Read more »

Saturday, October 8, 2016

Disable Cut Paste Copy Delete Renaming Files and Folders with Prevent

Disable Cut Paste Copy Delete Renaming Files and Folders with Prevent


You probably worry about your important personal data that could be accidentally deleted or renamed when your computer is being used by your kids or some third parties. If you are looking for any solution which can prevent data from being messed up or lost due to delete or rename action, then Prevent will be able to help you on this.

Prevent is a freeware and it is designed to disable cut, paste, copy, delete and rename functionality in your computer. As mentioned earlier, the main objective is to prevent anybody from deleting, renaming or messing around your data. Once you have run the installer, it will create a Prevent folder under system Program Files folder which contains Prevent.exe, Pre_1.exe, Pre_2.exe, Read Me First.txt, Uninstall.ini and Uninstall.exe. To run the program, you need execute Prevent.exe and it will display a window for you to define a hotkey. This hotkey is used to stop Prevent process and click Activate button once you have defined the hotkey. As soon as this program is activated, it will run at background silently and functions like cut, paste, delete and rename will be disabled regardless if they are initiated from keyboard button (Ctrl C, Ctrl X, Ctrl V, Delete), from right click context menu or under Edit menu. On top of this, it also takes the consideration to prevent data loss caused by terminating program without saving. As such, End Process button at Task Manager is disabled as well so that it doesn’t allow you to right click on process name and click on end process. To restore the setting, just use the hotkey you have defined earlier to stop the process.

Prevent ver 1.0 is absolutely free to download and it works well on Windows 2000/2003/2008/XP/Vista/7.

Source: mydigitallife


Go to link Download

Read more »

Tuesday, October 4, 2016

Disable auto save email address in Gmail

Disable auto save email address in Gmail


Any time u send a mail to new person , Gmail will automatically save add that persons contact list. So next time when you want to send e mail to the same person you need not to remember his/her email id because gmail has saved it as contact if you will write any part of his/her name gmail will show you list of matching contacts & you can select from it.

Now above feature is really very helpful if you are used to send mails to some small no of important people. But if you are used to send many emails a day to some people who are not very important then also Gmail will keep on auto saving those people to your contact list. So if you fill that these unnecessary contacts are cluttering your address book then you can disable this auto save feature. Heres how.....

1)Login to your Gmail account.

2)Click on setting tab.

3)Now under general tab you will find option like: "Create contacts for auto-complete" . For this option select radio button : "I will add contacts myself" .

Note: After changing this setting Gmail will not auto save any contacts so make sure that you add important contacts manually.:)

Go to link Download

Read more »

Disable permission request of plugins in Chrome

Disable permission request of plugins in Chrome


“This plugin needs your permission to run ” . Should i allow or not?. I should.  Every time. And that’s the pain of it.  Google should add another option “Remember Always” .Till then you have to enable it manually.
image
Does it bug you when a plugin asks your permission every time when it needs to run?. Java SE plugin does this often. Recently, in my Chrome installation , My RoboForm plugin started acting weird. It started asking for permission to run on each website. I tried re installing RoboForm , its extension. None of that worked.
But there is an easy way to enable ( or rather, force enable ) your trusted list of plugins  to run without asking your permission , ever. Remember, you should not allow all plugins to run without permission. That security feature is there for a reason.

Steps

For editing the permissions,
  • Open up your Chrome browser.
  • Go to  ” chrome://plugins/ “  in your chrome.
  • Tick “Always allowed” for the plugin you want to always give permission.

Go to link Download

Read more »

Sunday, August 28, 2016

DISABLE AND REMOVE AUTORUN MANUALLY

DISABLE AND REMOVE AUTORUN MANUALLY


DISABLE AND REMOVE AUTORUN MANUALLY

 
Welcome to (HACKING begins - "An approach to introduce people with the truth of HACKING"), Hello friend today Ill tell you how can you disable or remove Autorun.inf  related virus manually, We all know that some time when plugged pen drive to our system, some time Autorun.inf related virus spread into our system and copy its self without knowing and made undesirable changes in our system. Firstly i want to
clear that Autorun.inf is not a virus, Autorun.inf is a text file which instruct Windows about the execution priority when an operation is performed . AUTORUN is a trigger file which trigger the virus file attached with autorun and that file is trigger when we double click on any drive and folder without conforming that system is infected with autorun.inf or not and then autorun made undesirable changes in our system without knowing us, some times autorun viruses are not detected by anti-virus and infect our system completly.

CLICK HERE FOR MORE

Autorun virus : Symptoms of infection

Disable Task Manager.
Disable Folder Option.
Disable Registry Editor.
Make drives open in another window.
Hard disk autoplay.
msconfig  disabled.


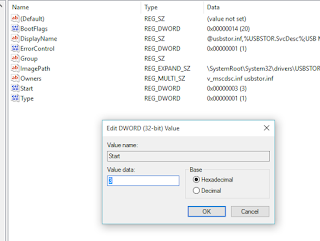
DISABLE AUTORUN                                                       

We can easily disable the autorun worm so it cant be infect our system when we double click on any drive or open USB drive.
  • Click on Start button and open RUN.
  • Type "GPEDIT.MSC". (without quote) (It will open Group Policy)
  • In Group Policy navigate to User configuration > Administrative Templates > System > On right side find Turn off autoplay.
  • Double Click on it and enable it with All Drives.
  • Click on OK button and exit from Group Policy.
  • Log off or Restart your system.
Now your autorun is disable and this will is also help you to protect your system from Autorun infection in future.

REMOVE AUTORUN.INF                                           

We can easily remove autorun.inf virus from system manually. Follow these steps to remove Autorun.inf.
  • Restart Computer and Press F11 key to Start up system in Safe Mode.
  • Start up your system with administrator account.
  • Go to Windows, then Run, and type "cmd" . Press enter. (It will open command prompt)
  • Type "cd" and press enter to get to the root directory of c: .
  • Type " C:attrib -s -r -h *.* " If you found any malicious EXE files then it is necessary to delete them also.
  • Type Del autorun.inf and press enter.
  • Repeat the same process with other drives, type "d:" and do the same thing.
  • Restart your system and make your system free from infections.
Safety Tip : Update your Anti virus daily to protect your system form these infections. 

Hope this is informative, kindly post your views and suggestions or comment on it.

Be  a real Hacker - PROFESSIONAL, and change the trend of HACKING.

Go to link Download

Read more »