Showing posts with label cyanogenmod. Show all posts
Showing posts with label cyanogenmod. Show all posts
Saturday, January 28, 2017
CyanogenMod 10 2 JellyBean 4 3 For Xperia ZL odin and Xperia Z yuga
CyanogenMod 10 2 JellyBean 4 3 For Xperia ZL odin and Xperia Z yuga


REQUIREMENTS:
- Bootloader Unlocked. If you have not unlocked it, then Follow this Guide by me or FXP.
Installation Process:
- For Xperia ZL- Download the ROM zip from here
- For Xperia Z- Download the zip from here
- Downlaod Gapps from here or here
Optional: Download any supplemental 3rd-party applications packages for the device you wish to use. (You have to install a 3rd-party app to get the Google apps, like Gmail, Play Store, and Youtube.)- Extract the boot.img from the zip, you will need this file for fastboot.
- Put the phone into fastboot mode:
- Open a terminal on the PC and enter the following:
fastboot -i 0xfce flash boot boot.img
fastboot -i 0xfce reboot- While the device reboots, press the Volume rockers a few times to load recovery.
- Once the device boots into the ClockworkMod Recovery, use the physical volume buttons to move up and down. On most devices, the power button is used to confirm your selection, although for some devices the power button is used as a "back" button to go up one level, in which case the home button is used to confirm the selection.
Optional/Recommended: Select backup and restore to create a backup of the current installation on the Xperia Z.- Select the option to wipe data/factory reset.
- Select Install zip from sdcard.
- Select Choose zip from sdcard.
- Select the CyanogenMod file you placed on the sdcard. You will then need to then confirm that you do wish to flash this file.
Optional: Install any additional packages you wish using the same method.- Once the installation has finished, return back to the main menu, and select the reboot system now option. The Xperia Z should now boot into CyanogenMod.
NOTE: Go to Developer options --> Root Access and change to "Apps and ADB" to fix root
- For Xperia ZL- Download the ROM zip from here
- For Xperia Z- Download the zip from here
- Downlaod Gapps from here or here
Optional: Download any supplemental 3rd-party applications packages for the device you wish to use. (You have to install a 3rd-party app to get the Google apps, like Gmail, Play Store, and Youtube.)
- Extract the boot.img from the zip, you will need this file for fastboot.
- Put the phone into fastboot mode:
- Open a terminal on the PC and enter the following:
fastboot -i 0xfce flash boot boot.img
fastboot -i 0xfce reboot
- While the device reboots, press the Volume rockers a few times to load recovery.
- Once the device boots into the ClockworkMod Recovery, use the physical volume buttons to move up and down. On most devices, the power button is used to confirm your selection, although for some devices the power button is used as a "back" button to go up one level, in which case the home button is used to confirm the selection.
Optional/Recommended: Select backup and restore to create a backup of the current installation on the Xperia Z.
- Select the option to wipe data/factory reset.
- Select Install zip from sdcard.
- Select Choose zip from sdcard.
- Select the CyanogenMod file you placed on the sdcard. You will then need to then confirm that you do wish to flash this file.
Optional: Install any additional packages you wish using the same method.
- Once the installation has finished, return back to the main menu, and select the reboot system now option. The Xperia Z should now boot into CyanogenMod.
Go to link Download

Monday, January 23, 2017
CyanogenMod 9 1 IceCreamSandwich For Xperia P U Sola Go FXP 216
CyanogenMod 9 1 IceCreamSandwich For Xperia P U Sola Go FXP 216
It has been an year since the release of Xperia U, Xperia P, Xperia Sola and Xperia Go and Due to FXP, a Recognized Developer on Xda, they are getting continuous stable release of CyanogenMod 9 and now the releases are fully stable with only minor Bugs which you can hardly notice. So now you should all use this ROM as a daily driver. So start rolling and Experience the awesome CM 9.1.
Then you might have a question in your mind on How to Flash this. So Follow the Instructions and it will be Fine:
REQUIREMENTS:
- Bootloader Unlocked. If you have not unlocked it, then Follow this Guide For Xperia U,P, Sola, Go. It is working.
Then you might have a question in your mind on How to Flash this. So Follow the Instructions and it will be Fine:
- Switch off your phone
- Hold vol+ Button and plug usb to boot into fastboot (blue led)
- fastboot flash boot boot.img (from cm10 zip)
- fastboot reboot
- Enter recovery, on boot led will be violet for 3 secs, During this period press vol+
- Flash rom zip
- Flash Gapps zip
- Wipe
- Reboot
DOWNLOAD:
- Xperia P(nypon) - Here
- Xperia U(kumquat) - Here
- Xperia Sola(pepper) - Here
- Xperia Go(lotus) - Here
If you want to download without interruption at Full Speed, then download it here And Select CM9, then FXP 216 and then your device codename.
- Xperia P(nypon)
- Xperia U(kumquat)
- Xperia Sola(pepper)
- Xperia Go(lotus)
CHANGELOG For FXP216:
- baseband display
- WiFi DHCP fix
Go to link Download
Wednesday, January 18, 2017
CyanogenMod 10 1 Jellybean 4 2 For Xperia Z and ZL FXP 231
CyanogenMod 10 1 Jellybean 4 2 For Xperia Z and ZL FXP 231
Xperia Z and ZL have been released with Stock JB 4.1 but Now FXP, a Recognized Developer on XDA have released an update. It is Jellybean 4.2 and its little different from 4.1 like it is having tile-style notifications in the lower-right corner and the app drawer in the upper-right, Quick Settings, Multi-User Support, etc..
So what are you waiting. Flash It and enjoy..
So what are you waiting. Flash It and enjoy..
REQUIREMENTS:
- Bootloader Unlocked. If you have not unlocked it, then Follow this Guide by me or FXP.
Installation Process:
- Download the ROM zip from here ( Select FXP 231 and then your device codename-->Xperia Z=yuga & Xperia ZL=odin)
Optional: Download any supplemental 3rd-party applications packages for the device you wish to use. (You have to install a 3rd-party app to get the Google apps, like Gmail, Play Store, and Youtube.)- Extract the boot.img from the zip, you will need this file for fastboot.
- Put the phone into fastboot mode:
- Open a terminal on the PC and enter the following:
fastboot -i 0xfce flash boot boot.img
fastboot -i 0xfce reboot- While the device reboots, press the Volume rockers a few times to load recovery.
- Once the device boots into the ClockworkMod Recovery, use the physical volume buttons to move up and down. On most devices, the power button is used to confirm your selection, although for some devices the power button is used as a "back" button to go up one level, in which case the home button is used to confirm the selection.
Optional/Recommended: Select backup and restore to create a backup of the current installation on the Xperia Z.- Select the option to wipe data/factory reset.
- Select Install zip from sdcard.
- Select Choose zip from sdcard.
- Select the CyanogenMod file you placed on the sdcard. You will then need to then confirm that you do wish to flash this file.
Optional: Install any additional packages you wish using the same method.- Once the installation has finished, return back to the main menu, and select the reboot system now option. The Xperia Z should now boot into CyanogenMod.
- Download the ROM zip from here ( Select FXP 231 and then your device codename-->Xperia Z=yuga & Xperia ZL=odin)
Optional: Download any supplemental 3rd-party applications packages for the device you wish to use. (You have to install a 3rd-party app to get the Google apps, like Gmail, Play Store, and Youtube.)
- Extract the boot.img from the zip, you will need this file for fastboot.
- Put the phone into fastboot mode:
- Open a terminal on the PC and enter the following:
fastboot -i 0xfce flash boot boot.img
fastboot -i 0xfce reboot
- While the device reboots, press the Volume rockers a few times to load recovery.
- Once the device boots into the ClockworkMod Recovery, use the physical volume buttons to move up and down. On most devices, the power button is used to confirm your selection, although for some devices the power button is used as a "back" button to go up one level, in which case the home button is used to confirm the selection.
Optional/Recommended: Select backup and restore to create a backup of the current installation on the Xperia Z.
- Select the option to wipe data/factory reset.
- Select Install zip from sdcard.
- Select Choose zip from sdcard.
- Select the CyanogenMod file you placed on the sdcard. You will then need to then confirm that you do wish to flash this file.
Optional: Install any additional packages you wish using the same method.
- Once the installation has finished, return back to the main menu, and select the reboot system now option. The Xperia Z should now boot into CyanogenMod.
CHANGELOG:
- sleep on lid close
Go to link Download
Monday, January 16, 2017
CyanogenMod 10 Jellybean 4 1 For Xperia S Acro S and Ion FXP 219
CyanogenMod 10 Jellybean 4 1 For Xperia S Acro S and Ion FXP 219
Xperia S, Acro S and Ion were released in 2012 and it has not been a long time since their release and they have got a CM10(Jellybean 4.1) Update by FXP, a Recognized Developer on XDA and they are fully stable and everything is working in it. They are ready for being used as Daily Drivers by all of you..
HERES A LIST OF WHAT IS WORKING IN THE ROM:
REQUIREMENTS:
Then you might have a question in your mind on How to Flash this. So Follow the Instructions and it will be Fine:
If you want to download without interruption at Full Speed, then download it here
And Select CM10, then FXP 219 and then your device codename.
CHANGELOG:
HERES A LIST OF WHAT IS WORKING IN THE ROM:
- GSM
- WiFi
- GPS
- ANT/ANT+
- Bluetooth
- Camera
- Front Camera
- HDMI
- NFC
- Proximity sensor
- Accelerometer/Compass
- Led notification
- Video playback/recording
- Audio playback/recording
- Sending/receiving SMS
- Volume rockers change track and volume
- Receiving/sending MMS (fix: turn data on)
- Offline voice typing
- Torch
- Fm Radio
- Nothing....
REQUIREMENTS:
- Bootloader Unlocked. If you have not unlocked it, then Follow this Guide by Sony or FXP.
Then you might have a question in your mind on How to Flash this. So Follow the Instructions and it will be Fine:
- Download The ROM Below.
- Put the downloaded zip in the root of your SD card
- Switch off your phone:
- Hold vol+ Button and plug usb to boot into fastboot (blue led)
- fastboot flash boot boot.img (from cm10 zip)
- fastboot reboot
- Enter recovery, on boot led will be violet for 3 secs, During this period press vol+ Flash rom zip
- Flash Gapps zip
- Wipe
- Reboot
- Xperia S(nozomi) - Here
- Xperia Acro S(hikari) - Here
- Xperia Ion(aoba) - Here
If you want to download without interruption at Full Speed, then download it here
And Select CM10, then FXP 219 and then your device codename.
- Xperia S - nozomi
- Xperia Acro S - hikari
- Xperia Ion - aoba
CHANGELOG:
- Nothing New
Go to link Download
Wednesday, December 21, 2016
CyanogenMod 10 Jellybean 4 1 For Xperia P U Sola Go FXP 236
CyanogenMod 10 Jellybean 4 1 For Xperia P U Sola Go FXP 236
I know that all Xperia P, U, Sola and Go users must be waiting For the release of CM10 For their devices since ages. But FXP Release new CM For devices only after making the current build fully stable for the device. So, after releasing a bugless CM9 for these Xperia devices, he moved on to release CM10 For these Devices and we hope that soon it will also become bugless in some weeks and then you might Get CM10.1 Update. But the current release contain many Bugs.. and for some it does not boot only.
Then you might have a question in your mind on How to Flash this. So Follow the Instructions and it will be Fine:
REQUIREMENTS:
- Bootloader Unlocked. If you have not unlocked it, then Follow this Guide For Xperia U,P, Sola, Go. It is working.
Then you might have a question in your mind on How to Flash this. So Follow the Instructions and it will be Fine:
- Switch off your phone
- Hold vol+ Button and plug usb to boot into fastboot (blue led)
- fastboot flash boot boot.img (from cm10 zip)
- fastboot reboot
- Enter recovery, on boot led will be violet for 3 secs, During this period press vol+
- Flash rom zip
- Flash Gapps zip
- Wipe
- Reboot
DOWNLOAD:
- Xperia P(nypon) - Here
- Xperia U(kumquat) - Here
- Xperia Sola(pepper) - Here
- Xperia Go(lotus) - Here
Go to link Download
Thursday, December 8, 2016
CyanogenMod 10 For Xperia E Dual GSM Working!!
CyanogenMod 10 For Xperia E Dual GSM Working!!

Xperia E Dual users were waiting For The Release of Jellybean with GSM working For their devices since a long time but now jjm34, a New Member on XDA have started working on it. And now they got an Alpha Release by them. It can be used as a daily driver. You know that CM10 is freaking awesome.., so Flash it and see the Results.
CHANGELOG:
- Initial Build
BUGS:
- Video recording doesnt work
- Video playback uses software decoders, not hardware
- Magnetometer doesnt seem to be working
- USB mass storage speed is slow
- FM radio not included (hardware and driver work, and tuning works as well, but its going to require quite a few changes to the audio subsystem to actually get sound out of it)
- Turning off screen in recovery doesnt work (screen timeout disabled by default)
- Inserting an unmountable SD card (unformatted, or unknown file system) will trigger a notification offering to format it. However, doing so will format the internal SD card
- CMs SMS tester to simulate incoming SMS (dev tools) doesnt work
REQUIREMENTS:
- Bootloader Unlocked. If you have not unlocked it, then Follow this Guide by Sony or FXP.
BEFORE WE BEGIN MAKE SURE TO DO THIS:
- If you dont have stock JB installed (11.3.A.2.1), you need to flash that first because this ROM only works with the baseband firmware that gets flashed with the stock JB ROM. GSM will be unavailable if youre coming from ICS. If you dont know about this, then find it Here.
INSTALLATION INSTRUCTIONS:
- Download The ROM From Here and Gapps From Here
- Extract the boot.img from the zip, you will need this file for fastboot.
- Put the phone into fastboot mode(Hold vol+ Button and plug usb to boot into fastboot (blue led):
- Open a terminal on the PC and enter the following:
- While the device reboots, press the Volume rockers a few times to load recovery.
- Once the device boots into the ClockworkMod Recovery, use the physical volume buttons to move up and down. On most devices, the power button is used to confirm your selection, although for some devices the power button is used as a "back" button to go up one level, in which case the home button is used to confirm the selection.
- Select the option to wipe data/factory reset.
- Select Install zip from sdcard.
- Select Choose zip from sdcard.
- Select the CyanogenMod file you placed on the sdcard. You will then need to then confirm that you do wish to flash this file.
- Once the installation has finished, return back to the main menu, and select the reboot system now option. The Xperia E should now boot into CyanogenMod.
Multi-SIM operation:
- Enable/disable SIM cards in Settings / Multi-SIM.
- Only one SIM card can have 3G enabled, but its not toggled automatically. To enable 3G on one SIM you have to make sure the other one is set to 2G-only mode first.
- Some of the dual-SIM features in Sonys ROM, such as auto-toggling SIM cards based on time, different ringtones, or data usage tracking arent included.
- SMS are currently always sent from whatever subscription is set as the SMS send subscription. This includes sending an SMS reply from the "incoming call" screen or the "missed call" notification.
- Note that battery life is shorter when two SIM cards are enabled. The reason for this is that the modem has to keep switching between two networks to remain registered and be able to receive network events, causing higher power consumption, higher latency, and lower throughput. This also causes the data connection to become slower when two SIMs are enabled. This isnt something that can be "fixed" because its not software-related. Having only one SIM card enabled will improve battery life and data connection speed.
USB mass storage mode:
He has enabled the USB mass storage driver to support mounting two storage devices simultaneously, so you can share both the "internal" and "external" SD cards as UMS.
Recovery will always mount both storage devices, but the Android GUI for USB mass storage will share the external SD card only, because the internal SD card is intended to remain available to the OS. However, you can manually mount the internal SD card from the shell:
Unmount storage from the OS:
vdc volume unmount sdcard
To unmount forcibly:
vdc volume unmount sdcard force
Share to USB:
vdc volume share sdcard ums
To disconnect from USB and re-mount storage to the OS:
vdc volume unshare sdcard ums
vdc volume mount sdcard
Go to link Download
Wednesday, November 2, 2016
CyanogenMod 10 2 Jellybean 4 3 For LG Optimus L5
CyanogenMod 10 2 Jellybean 4 3 For LG Optimus L5
Google has recently unveiled Jellybean 4.3 For Nexus Devices and CyanogenMod started merging the changes in Google source code and then the updates started rolling over to several other unsupported devices. LG Optimus L5 is such a device. XDA Recognized Developer, PecanCM has started the CM 10.2 development work on this device. Currently the ROM is in pre-Alpha stage but almost all the basic features are working. So have a taste of it..


Whats working:
- GSM
- Receiving and making calls
- Display
- Audio playback
- Audio recording
- Video playback
- Touch
- WiFi
- Wifi tethering
- OpenGL rendering
- Hardware video decoding & encoding
- USB-tethering
- Mtp/ptp
- Sd card
Not working:
- Camera (photos, camcorder & panorama)
- Video recording
- Bluetooth
- Bluetooth tethering
- and other things
Not Tested:
- GPS
- NFC
Installation Process:
Note : CM-10.2 is only for jellybean (v20) baseband. If you are on ics (v10) baseband flash v20 baseband from this thread
- Download the ROM zip from here
- Place the rom .zip file on the root of the SD card.
- Boot to recovery mode on the device by holding Hold Volume Up & the Power button. Hold all Buttons until the Screen flashes, then release the Power button..
- Once the device boots into the ClockworkMod Recovery, use the physical volume buttons to move up and down. On most devices, the power button is used to confirm your selection, although for some devices the power button is used as a "back" button to go up one level, in which case the home button is used to confirm the selection.
- Select the option to wipe data/factory reset.
- Select the option Wipe dalvik-cache in advanced.
- Select install zip from sdcard.
- Select choose zip from sdcard.
- Select the zip file you placed on the sdcard. You will then need to then confirm that you do wish to flash this file.
- Once the installation has finished, return back to the main menu, and select the reboot system now option.
- Enjoy!!
Go to link Download
Tuesday, October 4, 2016
CyanogenMod 10 Jellybean 4 1 For Xperia TX FXP 219
CyanogenMod 10 Jellybean 4 1 For Xperia TX FXP 219
Xperia TX users were waiting For The Release of Jellybean For their devices since a long time and now FXP, a Recognized Developer on XDA have started supporting the device for their releases. And TODAY they got an Alpha Release by them. It is not currently for daily use but I think that you all will be getting a Fully stable release in some weeks. Till then wait and have a look at the bugs of the ROM and try it..
And Select CM10, then FXP 219 and then your device codename.
CHANGELOG:
- Reduce audio gain
REQUIREMENTS:
- Bootloader Unlocked. If you have not unlocked it, then Follow this Guide by Sony or FXP.
INSTALLATION INSTRUCTIONS:
- Download The ROM Below.
- Put the downloaded zip in the root of your SD card
- Switch off your phone:
- Hold vol+ Button and plug usb to boot into fastboot (blue led)
- fastboot flash boot boot.img (from cm10 zip)
- fastboot reboot
- Enter recovery, on boot led will be violet for 3 secs, During this period press vol+ Flash rom zip
- Flash Gapps zip
- Wipe
- Reboot
DOWNLOADS:
- Xperia TX(hyabusa) - Here
And Select CM10, then FXP 219 and then your device codename.
- Xperia TX - hyabusa
Go to link Download
Wednesday, September 21, 2016
CyanogenMod 10 1 Jellybean 4 2 For Xperia T and V FXP 219
CyanogenMod 10 1 Jellybean 4 2 For Xperia T and V FXP 219
There is almost Fully Stable CM10 For Xperia T and V brought by FXP, a Recognized Developer on XDA and now he have released CM10.1 For them which is also working flawlessly on them... It is also almost stable and ready for using it as a Daily Driver..
DOWNLOAD:
If you want to download without interruption at Full Speed, then download it here
And Select CM10.1, then FXP 219 and then your device codename.
REQUIREMENTS:
- Bootloader Unlocked. If you have not unlocked it, then Follow this Guide by Sony or FXP.
Then you might have a question in your mind on How to Flash this. So Follow the Instructions and it will be Fine:
- Download The ROM Below.
- Put the downloaded zip in the root of your SD card
- Switch off your phone:
- Hold vol+ Button and plug usb to boot into fastboot (blue led)
- fastboot flash boot boot.img (from cm10 zip)
- fastboot reboot
- Enter recovery, on boot led will be violet for 3 secs, During this period press vol+ Flash rom zip
- Flash Gapps zip
- Wipe
- Reboot
DOWNLOAD:
- Xperia T(mint) - Here
- Xperia V(tsubasa) - Here
If you want to download without interruption at Full Speed, then download it here
And Select CM10.1, then FXP 219 and then your device codename.
- Xperia T=mint
- Xperia V=tsubasa
- Update support tool TWRP
- Enable LPA
- Improved Thermal mitigation
- Fix Ambient Light Sensor
Go to link Download
Sunday, August 28, 2016
CyanogenMod 10 2 JellyBean 4 3 For LG P500
CyanogenMod 10 2 JellyBean 4 3 For LG P500
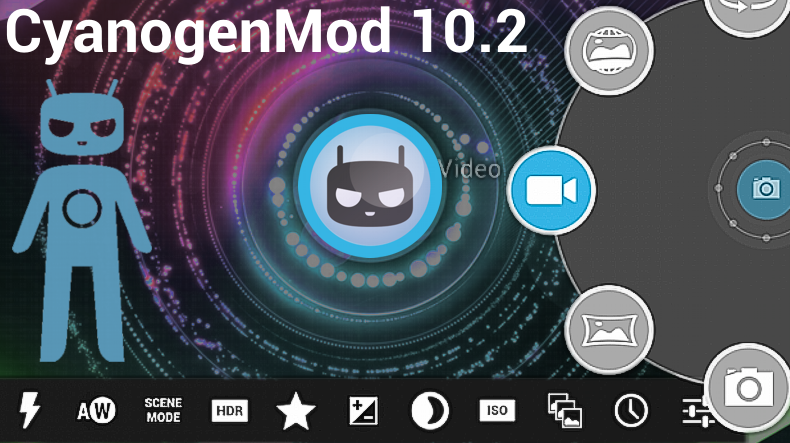
CyanogenMod 10.2 (Jellybean 4.3) is rolling out at a tremendous speed to various low-end legacy devices and this is possible due to Androidarmv6 team. LG P500 is also a legacy device and it has got this update recently by Rashed97, a Recognized Developer on xda. It has almost all the things fixed. So hurry up and give it a try and enjoy the taste of latest Jellybean 4.3 on your devices..
Whats working:
- Camera
- Video recording
- Panorama
- Video playback (LQ and HQ)
- WiFi
- Bluetooth
- 3G
- Hardware lights
- Display
- All accelometers
- Google Apps
- Most Project Butter related enhancements
- All native apps
- All audio
- Airplane Mode
- Screen off and on animations
- Lockscreen animations
- Most CM10.2 features
Installation Process:
- Download the ROM zip from here(Go to this link and download your device zip)
- Place the rom .zip file on the root of the SD card.
- Boot a o recovery mode on the device by holding Hold Volume Up & the Power button. Hold all Buttons until the Screen flashes, then release the Power button..
- Once the device boots into the ClockworkMod Recovery, use the physical volume buttons to move up and down. On most devices, the power button is used to confirm your selection, although for some devices the power button is used as a "back" button to go up one level, in which case the home button is used to confirm the selection.
- Select the option to wipe data/factory reset.
- Select the option Wipe dalvik-cache in advanced.
- Select install zip from sdcard.
- Select choose zip from sdcard.
- Select the zip file you placed on the sdcard. You will then need to then confirm that you do wish to flash this file.
- Once the installation has finished, return back to the main menu, and select the reboot system now option.
- Enjoy!!
Go to link Download
Subscribe to:
Posts (Atom)